Instructions
VoIP phone

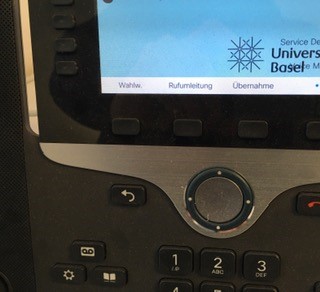
- Press the voicemail speed dial key on the VoIP phone.
- Call the number 79999 (internal) or +41 61 207 99 99 (external).
- A PIN query follows.
Depending on whether a connection to the voicemail has already been established, the procedure changes slightly:
Existing voicemail
Enter your personal voicemail pin and press the double cross.
You are now connected to your voicemail.
New voicemail
- Enter the default pin and press the double cross (#).
- You will now be guided through the initial voicemail setup via the voice menu. This includes configuring your voicemail greeting, setting your personal PIN and setting the directory service.
- After completion you are connected to your voicemail.
- From now on, you can connect directly to voicemail by entering your personal voicemail PIN.
Configure voicemail
To change the voicemail greeting, first connect to voicemail, then press the "4" key to enter the setup menu:
- Press the "4" key to enter the setup menu.
- Press "1" to edit the greetings.
- Press "1" to adjust the default greeting.
- The greeting can now be re-recorded after the beep. Press the double cross (#) to finish.
Jabber

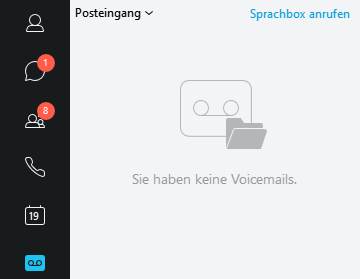
- Press the "Call voicemail" button in the voicemail tab of Cisco Jabber.
- Call the number 79999 (internal) or +41 61 207 99 99 (external).
- You will be asked for a PIN.
Depending on whether a connection to the voicemail has already been established, the procedure changes slightly:
Existing voicemail
Existing voicemail Enter your personal voicemail pin and press the double cross.
You are now connected to your voicemail.
New voicemail
Enter the default pin and press the double cross (#). 2.
You will now be guided through the initial voicemail setup via the voice menu.
This includes configuring your voicemail greeting, setting your personal PIN and setting the directory service. 3.
After completion you are connected to your voicemail. 4.
From now on you can connect directly to your voicemail by entering your personal voicemail PIN.
Configure voicemail
To change the voicemail greeting, first connect to voicemail. Then:
1. press the "4" key to enter the setup menu.
Press "1" to edit the greetings. 3.
Press "1" to customize the default greeting. 4.
The greeting can now be re-recorded after the beep. Press the double cross (#) to finish.

Press the "Call Forwarding" key
and then the "Voicemail" key on your Cisco phone or you dial the destination number

After configuring voicemail, a phone number can be redirected to it.
- Press the "Call Settings" button in the Cisco Jabber software.
- Then select the option Voicemail under "Forward calls".
- Then click on "Call Forwarding" in the Phone tab.
- Now you can activate the option "Forward all calls to: Voicemail".
Service Desk
IT-Services
Spitalstrasse 41, 3rd Floor
CH-4056 Basel
Phone +41 61 207 14 11
E-mail support-its@unibas.ch
Quick Links
