Prerequisite
a) You have the e-mail program Microsoft Outlook 2016.
b) You know the terms of use of the University of Basel.
Share your own calendar

Open the e-mail program "Outlook". Select the "Calendar" tab at the bottom of the screen.

Click on "Calendar Permissions" at the top of the screen. If the field is not clickable, click on a free space in the calendar view.
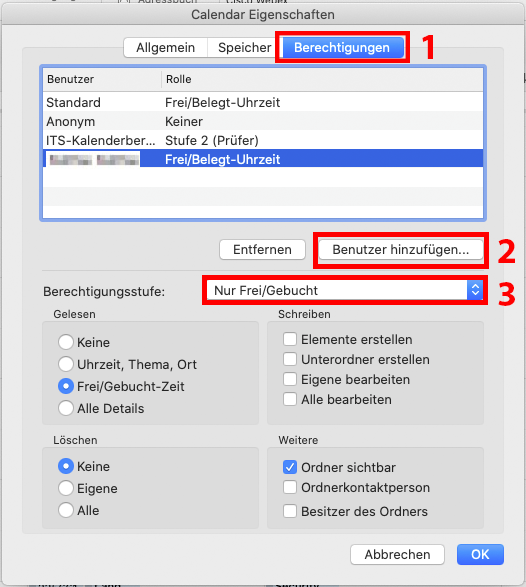
The window for the "Calendar properties" opens. First click on the tab "Permissions" [1]. Under "Add user..." [2] and enter the name of the person who should get access to the calendar and click "Add". Under Permission Level [3] you can select how many details of the calendar entries should be visible to the person.
Prerequisite
a) You have the e-mail program Microsoft Outlook 2016.
b) You know the terms of use of the University of Basel.
release substitution

Open the e-mail program "Outlook". Select the "Calendar" tab at the bottom of the screen. In the top left corner, click on the "Outlook" tab and then on "Settings...".

Now click on the Accounts tab.

Then click on the "Advanced..." tab at the bottom right.

Then click on the "Substitutes" tab and then on the plus ( + ) under the list of "Substitutes who may act on my behalf".
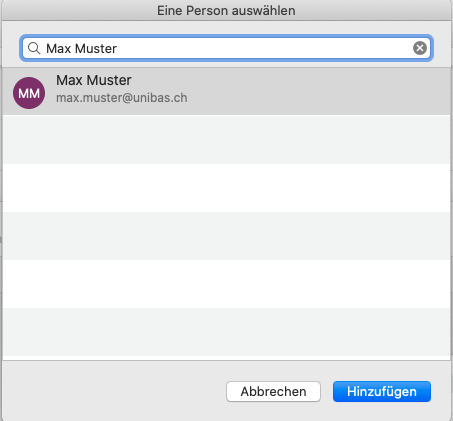
Enter the name of the person who will be the deputy and click on "Add".
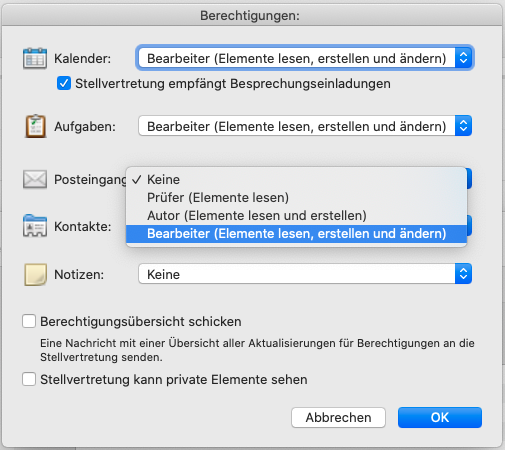
In the following window, you can determine how comprehensive the rights of the persons added as deputies are. You can choose between reviewer, author and editor. Confirm this by clicking "OK" in both windows.
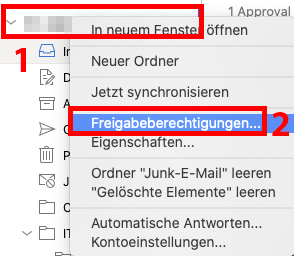
Next, you have to make the folders of your mailbox visible for the deputy. To do this, open the "Start" tab and then select your mailbox, which is located in the left column. Right-click on the top level of your mailbox [1] and then on "Share permissions..." [2]. [2].
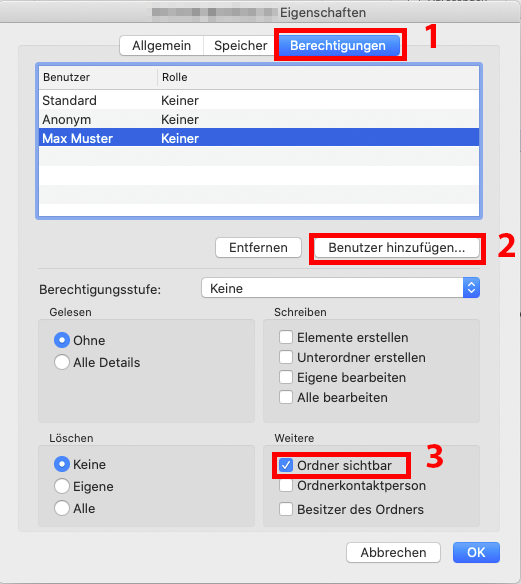
There you switch to the tab "Permissions" [1]. If the person in question does not yet exist, you can add him/her via "Add" [2]. Afterwards you have to select the deputy and set a check mark at "Folder visible" [3].
Prerequisite
a) You have the e-mail program Microsoft Outlook 2016.
b) You know the terms of use of the University of Basel.
Set up substitution

Open the e-mail program "Outlook". Select the "Calendar" tab at the bottom of the screen. In the top left corner, click on the "Outlook" tab and then on "Settings...".

Now click on the Accounts tab.

Then click on the "Advanced..." tab at the bottom right.

Then click on the tab "Substitutions" and then on the plus ( + ) under the listing of "Additionally open these mailboxes".
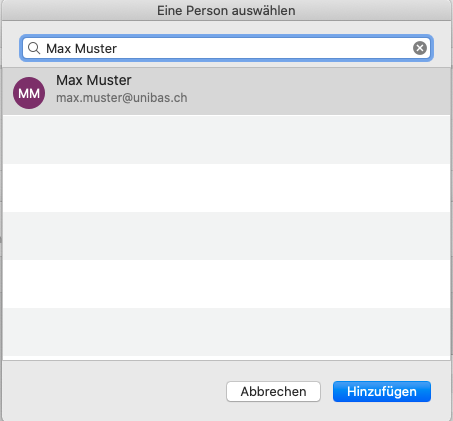
Enter the name of the person who will be the deputy and click "Add". Then click OK at the bottom right.
The new mailbox is now displayed in the left column below your own.
Attention: If the mailbox is empty, you probably have not received any rights on this mailbox yet.